 Save to Pinterest
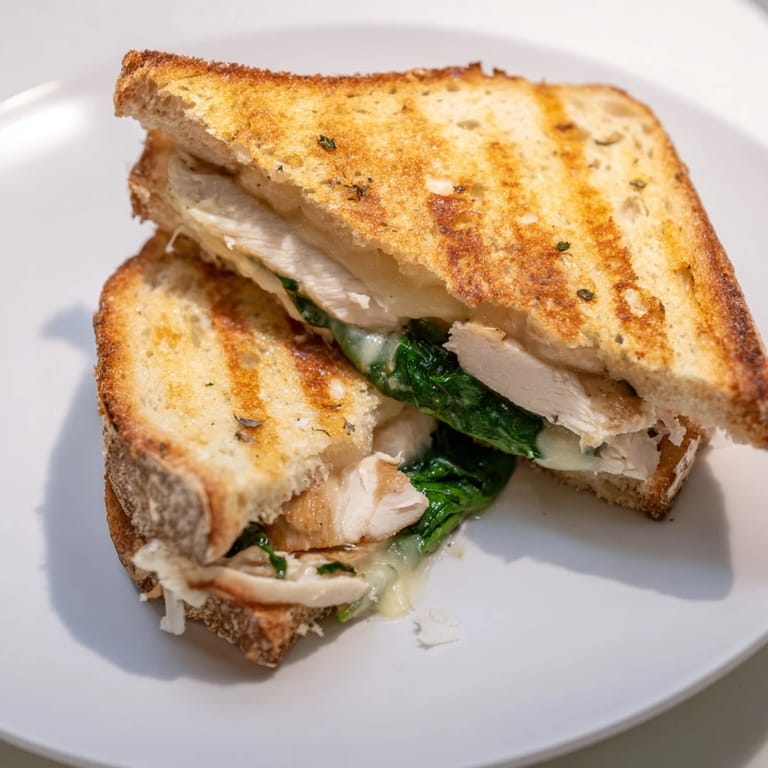
 There was a Sunday afternoon when I had leftover grilled chicken and a loaf of sourdough going stale on the counter. I remembered a café panini I'd loved years ago and decided to wing it with what I had. The garlic butter was a last-minute idea, and the smell that filled the kitchen as it pressed made me wish I'd thought of it sooner. That sandwich turned into something I now make whenever I need comfort food that feels a little fancy.
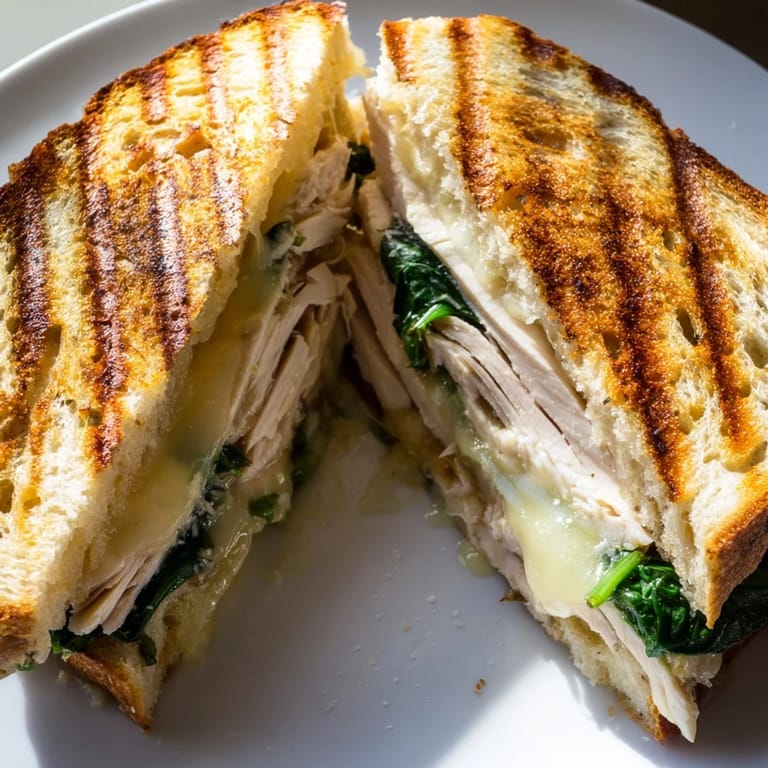
I made this for a friend who stopped by unexpectedly one rainy evening. She sat at the kitchen island while I assembled the sandwiches, and we talked about nothing important while the press hissed and the cheese started to ooze out the sides. When I sliced hers in half, the steam rose up, and she said it smelled like the best kind of Italian restaurant. We ate them standing up, too hungry to wait, and she asked for the recipe before she even finished.
Ingredients
- Boneless, skinless chicken breasts: Grilling them with Italian herbs gives a subtle seasoning that doesn't overpower the garlic butter, and slicing them thin ensures every bite has protein without being too bulky.
- Olive oil: Brushing it on the chicken before grilling keeps the meat moist and helps the seasoning stick.
- Salt, black pepper, and dried Italian herbs: This simple trio seasons the chicken just enough to complement the richness of the cheese and butter.
- Unsalted butter: Softened butter blends smoothly with garlic and parsley, and using unsalted lets you control the salt level in the finished panini.
- Garlic cloves: Minced fresh garlic in the butter creates those aromatic pockets that make the bread irresistible as it toasts.
- Fresh parsley: Finely chopped parsley adds a pop of color and a hint of freshness that balances the richness.
- Rustic Italian or sourdough bread: Sturdy bread with a good crust holds up to the press and doesn't get soggy from the cheese and spinach.
- Fresh baby spinach: Washing and drying it well prevents excess moisture, and it wilts just enough under the heat without turning slimy.
- Shredded mozzarella cheese: It melts beautifully and gives you that classic cheese pull, and provolone works just as well if you want a sharper flavor.
- Grated Parmesan cheese: It adds a nutty, salty depth that mozzarella alone can't provide, and it crisps up slightly on the edges.
- Olive oil for brushing: A light brush on the outside of the bread (if not using a press) helps it turn golden without burning.
Tired of Takeout? 🥡
Get 10 meals you can make faster than delivery arrives. Seriously.
One email. No spam. Unsubscribe anytime.
Instructions
- Preheat and prep the grill:
- Get your grill pan or outdoor grill to medium-high heat so it's ready to sear the chicken with those nice grill marks. A hot surface locks in the juices right away.
- Season and grill the chicken:
- Brush the chicken breasts with olive oil, then season them evenly with salt, pepper, and Italian herbs before placing them on the grill. Cook for 5 to 6 minutes per side until the internal temperature hits 165 degrees, then let them rest for 5 minutes before slicing thinly against the grain.
- Make the garlic butter:
- In a small bowl, mix the softened butter with minced garlic and finely chopped parsley until it's well combined and fragrant. This will be the magic layer that makes the bread golden and flavorful.
- Butter the bread:
- Lay out all 8 slices of bread on your work surface and spread the garlic butter on one side of each slice. The buttered side will face out when you assemble the sandwiches.
- Layer the fillings:
- On the unbuttered side of 4 bread slices, layer the sliced grilled chicken, a handful of fresh spinach, shredded mozzarella, and a sprinkle of Parmesan. Top each with another slice of bread, buttered side facing out, and press gently.
- Press and cook the panini:
- Heat your panini press or a large skillet over medium heat, then place the sandwiches in the press or skillet (if using a skillet, weigh them down with a heavy pan). Cook for 3 to 5 minutes per side until the bread is golden brown and the cheese is fully melted and gooey.
- Slice and serve:
- Remove the panini from the heat, slice each one in half on the diagonal, and serve immediately while the cheese is still stretchy. The crispy exterior and warm, melty center are best enjoyed right away.
 Save to Pinterest
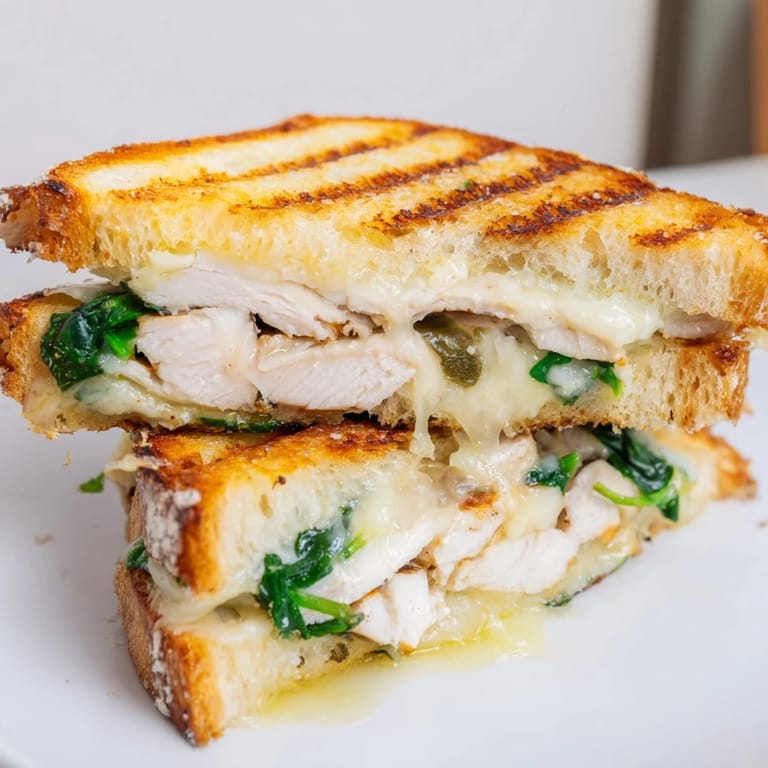
 One winter night, I made these for my family after a long day, and my daughter said it tasted like the sandwiches we used to get at the little Italian deli near our old house. I hadn't been trying to recreate that memory, but it made me realize how certain flavors can bring people back to a place they loved. We lingered at the table longer than usual that night, talking and laughing, and the panini became more than just dinner.
What to Serve with Your Panini
A simple green salad with a lemony vinaigrette cuts through the richness of the cheese and garlic butter beautifully. I also love serving these with a bowl of warm tomato soup for dipping, especially on colder days when you want something cozy. Roasted sweet potato fries or a handful of kettle chips on the side add a nice crunch without too much effort.
Making It Your Own
You can swap the chicken for turkey breast or even leftover rotisserie chicken if you're short on time. I've added thin slices of tomato and roasted red peppers when I had them on hand, and both brought a sweet, smoky layer that made the panini feel even heartier. If you like a bit of heat, a few slices of pickled jalapeños or a smear of pesto on the inside takes it in a completely different direction.
Storage and Reheating Tips
These are best eaten fresh, but if you have leftovers, wrap them tightly in foil and store them in the fridge for up to 2 days. Reheat them in a skillet over medium-low heat to bring back some of the crispness, or pop them in a 350-degree oven for about 10 minutes. The microwave will make the bread chewy, so avoid it if you can.
- Press leftovers in a dry skillet to re-crisp the bread without adding more butter.
- Store uncooked assembled sandwiches in the fridge for up to 4 hours before pressing if you want to prep ahead.
- Freeze grilled chicken slices separately so you can make panini on demand anytime.
 Save to Pinterest
 This panini has become my go-to when I want something satisfying without a lot of fuss. It feels indulgent, but it comes together quickly, and every time I make it, someone asks for seconds.
Recipe Frequently Asked Questions
- → How do I know when the chicken is fully cooked?
Grill chicken for 5–6 minutes per side until the internal temperature reaches 165°F (74°C) using a meat thermometer. The juices should run clear when pierced. Let it rest for 5 minutes before slicing to retain moisture.
- → Can I prepare the panini ahead of time?
Assemble the panini up to 2 hours before pressing and cooking. Keep it refrigerated until ready to cook. Add an extra minute or two to the cooking time if starting from cold.
- → What cheese works best for this panini?
Mozzarella is ideal for its melting quality and mild flavor. Provolone offers a slightly sharper taste and also melts beautifully. Combining both with Parmesan adds complexity and prevents the filling from being too mild.
- → Do I need a panini press or can I use a regular skillet?
A panini press is ideal but not necessary. Use a heavy skillet or cast-iron pan and place another heavy pan on top as a weight. This creates the same pressing effect and golden crust without dedicated equipment.
- → What can I substitute for spinach?
Arugula, basil, roasted red peppers, or sun-dried tomatoes work wonderfully. For a heartier option, try wilted kale or sautéed mushrooms. Adjust cooking time slightly if using cooked vegetables.
- → How do I prevent the bread from getting soggy?
Pat the spinach dry before layering to remove excess moisture. Toast the bread lightly before assembling if desired. Place the cheese directly against the bread to create a barrier between the filling and bread.