 Save to Pinterest
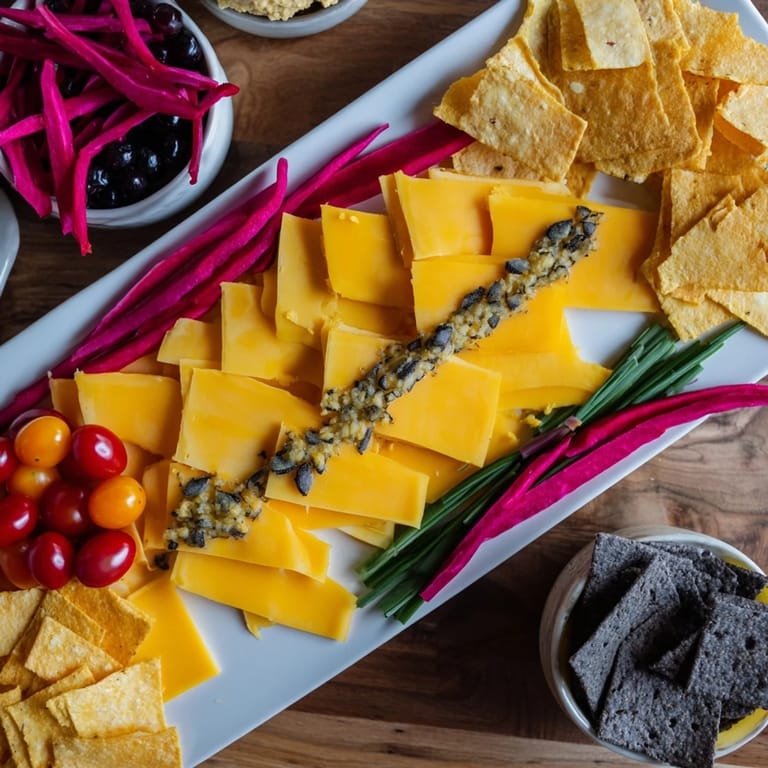
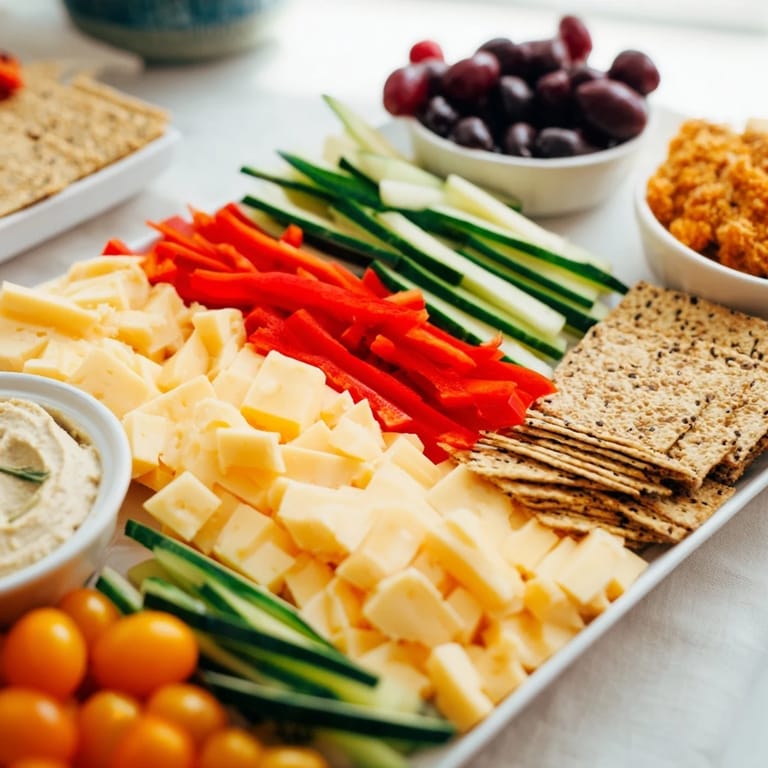
 I remember the moment I first saw a lightning bolt arrangement at a gallery opening—not in a museum, but on a caterer's table. The zig-zag of contrasting colors stopped me mid-conversation. Red, white, black, gold all cutting through the platter like electricity frozen in time. I went home that night thinking about how food could be as visually striking as art, and that's when I created this Zig-Zag Lightning Strike board. It's become my signature move whenever I need something that makes people gasp before they even taste it.
Last summer, I made this for my daughter's graduation open house, and I watched her friends circle the platter like they were admiring a painting. One guest actually asked if she could take a photo before eating anything. That's when I knew this wasn't just a snack board—it was a moment maker.
Ingredients
- Red bell pepper strips: These are your lightning's hottest core, where the eye lands first. Cut them into long, aggressive angles rather than gentle curves—the knife work is part of the drama.
- Yellow bell pepper strips: The bright contrast partner to red, they create that electric feeling when placed side by side. Sweet and crisp when fresh.
- Cucumber sticks: Your cooling element, both visually and on the palate. They stay crisp longer if you prep them last and keep them cool.
- Purple carrots: These are the secret weapon. Most people expect orange, so purple ones create delightful surprise. They stay crunchier longer than other vegetables.
- Sharp white cheddar: Slice it thin enough to drape slightly, thick enough to have substance. The sharpness cuts through the sweetness of the fruits beautifully.
- Black wax gouda: This is your dramatic punctuation mark. It's richer and slightly smoky compared to the cheddar, adding depth.
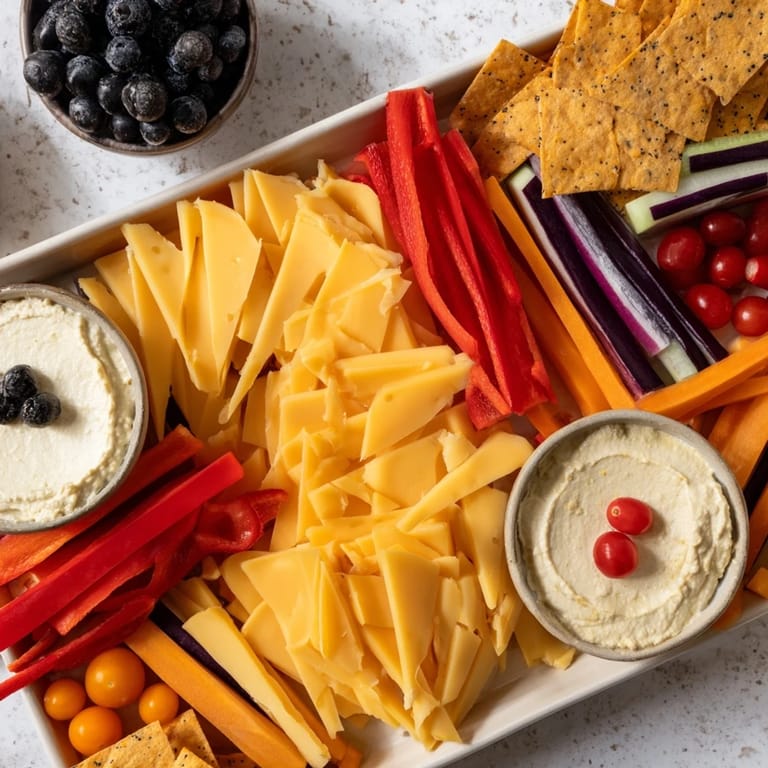
- Blueberries: They nestle into the board like tiny gems, adding juice pops and sweetness. Use the freshest you can find.
- Golden cherry tomatoes: The warm tone balances the cool vegetables. Halving them keeps them from rolling.
- Beet hummus: This is the jewel-toned dip that makes people ask what it is. Its earthiness grounds all the bright colors.
- Classic hummus: A creamy anchor point, familiar and comforting alongside the more adventurous elements.
- Blue corn tortilla chips: These reinforce the color story—they're not an afterthought but part of the artistic composition.
- Black sesame rice crackers: They add another textural crunch and visual weight to the angular edges.
Tired of Takeout? 🥡
Get 10 meals you can make faster than delivery arrives. Seriously.
One email. No spam. Unsubscribe anytime.
Instructions
- Gather and prepare your canvas:
- Wash everything first, then pat dry. This step matters more than you'd think—wet vegetables will make everything slide around. Cut your vegetables into long, intentional pieces. Think angry angles, not gentle curves. A sharp chef's knife makes all the difference here; dull blades crush vegetables and rob them of their crispness. As you cut, arrange pieces on the board as you go—this is where you start feeling out the composition.
- Establish your lightning path:
- Find your starting corner and imagine a bolt striking diagonally across. This is your reference line. Starting with your boldest color (I usually begin with red pepper), lay down the first line of your zig-zag, making sure the pieces angle sharply. Feel the geometry as you place each item.
- Build with contrast:
- This is where the magic happens. After red comes white cheddar (the contrast makes both pop), then you might go yellow pepper, then black gouda. The rule is simple: never put similar colors next to each other. Keep asking yourself, 'Will these colors make each other brighter?' If the answer is yes, you're on the right track.
- Create rhythm with repetition:
- As your zig-zag grows, you'll notice patterns emerging. Repeat them intentionally. If you've done red-white-yellow-black once, do it again. Consistency creates confidence, and confidence looks intentional.
- Position your anchors:
- Place your two dip bowls at natural junction points where the zig-zag might turn or where you want to draw the eye. These bowls become part of the design, not afterthoughts.
- Frame with crunch:
- Tuck your chips and crackers along the sharp edges of your lightning bolt, almost like they're following the electrical current. This reinforces the angular shape and adds another textural element.
- Scatter your jewels:
- Blueberries and cherry tomatoes go last, filling gaps and adding final pops of color. Imagine you're placing stars in a constellation—deliberate but organic feeling.
- Step back and adjust:
- Before serving, stand back and look at the whole board. Are there any gaps that feel empty? Any colors that need better placement? Trust your eye. This is your board, and it should make you happy to serve it.
- Serve with confidence:
- The moment you set it down, you're done. Don't fuss with it. The beauty is in the boldness, and people will feel your confidence in the arrangement.
 Save to Pinterest
 There's a moment that always happens when I serve this board—the room goes quiet for just a second. Not because people are being polite, but because they're actually seeing it before they eat it. That's the real recipe here.
Making It Your Own
The beauty of a zig-zag board is that it's really just a structure waiting for your personal touch. You can follow my ingredient list exactly, or you can use it as a starting point. The important part is understanding the principle: bold colors next to their opposites, sharp angles instead of curves, and treating your board like you're creating something for a gallery wall, not just a table. I've made versions with roasted vegetables, smoked meats, or entirely vegan ingredients, and the lightning bolt shape makes everything feel intentional and artistic.
Timing and Temperature
This board takes twenty minutes to prepare, but that time is mostly in the cutting and thinking. Once you've laid out your ingredients, the actual assembly happens fast—maybe five minutes. The key is keeping everything cold until the moment you serve. I like to prep my vegetables and keep them in the fridge in separate containers, then assemble the board right before guests arrive. The slight chill keeps everything crisp and makes the colors look even more vivid.
Why Angles Matter More Than You'd Think
When I first tried to make this board, I cut everything into uniform circles and arranged them neatly. It looked fine, but it looked flat. Then I switched to aggressive angles, and something shifted. The sharp lines create movement and energy that the eye actually follows. It's not magic—it's just geometry and color theory working together. The angles make the viewer's eye dance across the board instead of resting in the middle. They also make the board feel more modern and intentional, less like a standard veggie platter and more like something you designed on purpose.
- Cut vegetables at 45-degree angles when possible to emphasize sharpness
- Arrange them so the points face outward, creating actual lightning-bolt geometry
- Keep your color changes as dramatic as the angle changes—they should feel like a visual rhythm
 Save to Pinterest
 This board has become my answer to almost every entertaining question. It's beautiful, it's easy, and it makes people feel like you've put thought and care into what they're eating. That's really all any good recipe does.
Recipe Frequently Asked Questions
- → What vegetables work best for the angular arrangement?
Long, crisp vegetables like bell peppers, cucumbers, and purple carrots cut into sticks emphasize the sharp, zig-zag design effectively.
- → Are there suitable substitutions for cheeses?
For vegan preferences, plant-based cheeses can replace the cheddar and gouda while maintaining a similar texture and shape.
- → How can I enhance visual contrast on the board?
Alternating colors like red pepper next to white cheddar and cucumber beside black gouda maximize the bold, lightning-inspired effect.
- → What dips complement this platter style?
Classic and beet hummus add creamy texture and vibrant color that pair well with the angular shapes and fresh produce.
- → Can this platter accommodate gluten-free diets?
Yes, substituting regular crackers with gluten-free options ensures the platter remains accessible to gluten-sensitive guests.